
The topic of tabs and leaders has been covered on InDesignSecrets before in a 6-part series but it’s worth sharing this particular tip as it saves me plenty of heartache in my day-to-day role.
Usual technique
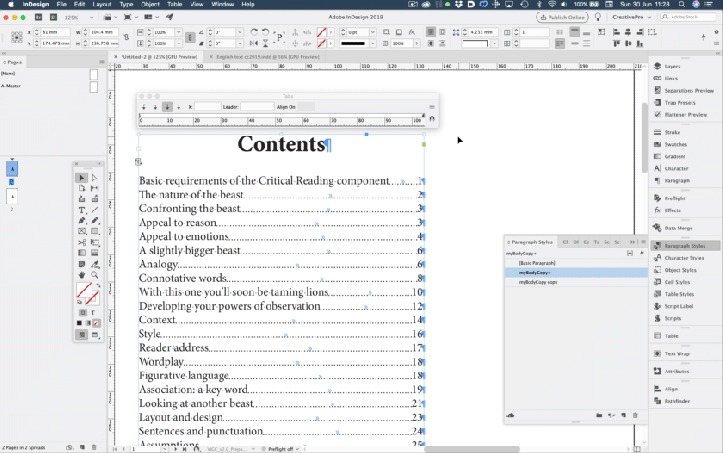
The usual practice of creating a dotted line (usually for either leading up to a page number in a table of contents OR preparing a space for users to add information to a handwritten form) is often accomplished by the tabs feature. For example:

This is achieved by making a paragraph style that has a tab stop that has been right-aligned to the end of the text frame, and in the leader text field of the tab dialog box, a period has been entered, and it is this period that repeats to generate the dotted line.

Issues with this technique
However, I find this is quite restrictive in terms of:
- What the dots look like;
- How close the dots get to and from their respective text;
- The inability to change the dots en masse
My preferred technique
Instead, I prefer to make a character style called “dotted line” giving it the dotted line appearance that I’m after in the underline panel of the character style dialog box.

If more control is required, I can also prepare a stroke style specifying the dot style and frequency that the dots appear.

I can then either apply the character style manually to the areas requiring the dotted lines, or I can make a paragraph style that calls the dotted line character style using a GREP style that looks for tab spaces.

Bonus tip
Note that my GREP style is looking for \t|~y rather than just \t – the ~y represents a right indent tab. For dot leaders that need to go to text at the end of a text-frame, I prefer to use a right indent tab instead of setting a right align tab, because if the text frame changes width and I want the right aligned item to remain right aligned to the text frame, I don’t have to adjust the tab stop of the right align tab.
To insert a right indent tab, press SHIFT+TAB. This will work anywhere in a text frame except within a table where it will highlight the previous cell. To apply a right indent tab inside a table, either insert one via right-clicking to call upon the contextual menu, then navigate to Insert Special Characters, Other, then Right Indent Tab.

Otherwise, it can be called upon by opening the quick-apply menu via COMMAND+RETURN on Mac (or CONTROL+RETURN on Windows) and type either Right Indent Tab (or, if you’re really lazy – nt tab as highlighted in pink in the figure below).

Yesssss!!!! Thank you! You just saved me lots of tab hassle.