
2015-07-03 NOTE: This article is now out of date since the release of Adobe InDesign CC 2015. However, I have left the article here for posterity.
A previous post has discussed issues with PDF proofing for issues relating to quality.
If checking content only, PDF proofs can be an efficient way of checking content, given that hard copy proofs do not have to be created or delivered to the client. If the client also has the latest version of Acrobat Reader, PDF proofing also allows alterations or markups to be made on the PDF proof.
One feature I would like to be able to control in InDesign when preparing the PDF is how the PDF should appear on the client’s screen. Adding bookmarks and other interactive elements to a PDF is fine, but ultimately for the creation of content that is for other purposes rather than a print-proof, these features are not necessary.
It is possible to control the security settings of the PDF:
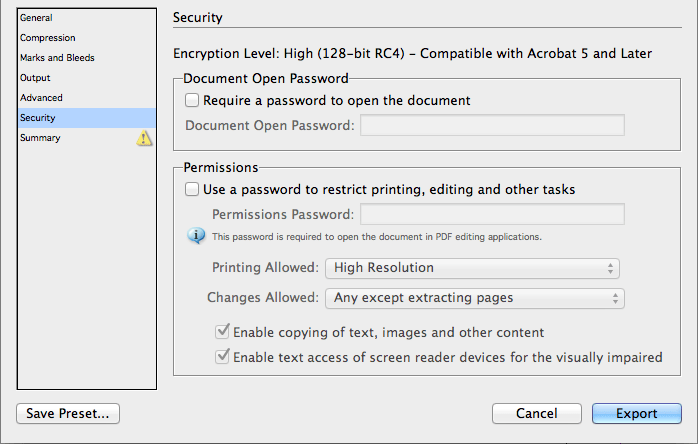
But what cannot be controlled from InDesign is the size and page presentation of the PDF. When viewing a PDF in Adobe Acrobat, the file will appear at the size and presentation options that are in the client’s defaults (from the Preferences/General menu).

There are occasions where checking a PDF at the correct size and presentation are important, such as:
- Seeing pages that feature cross-overs in a readers spread;
- Seeing the artwork at the finished size (e.g. can reveal if type sizes are too big or small)


These view settings cannot be controlled by InDesign, but can be controlled in Acrobat Professional. While a PDF is open, the options can be found under the File/Properties menu.
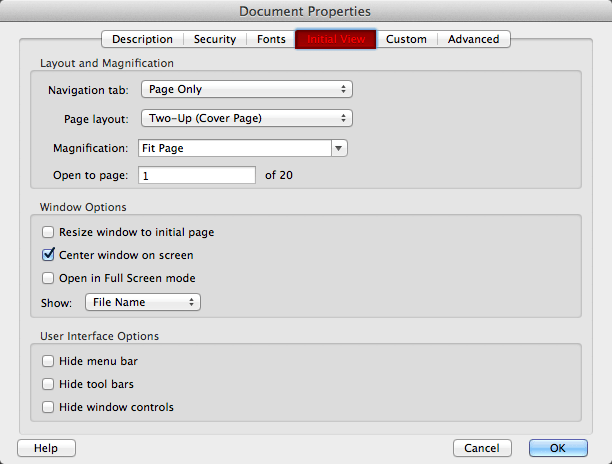
These initial view settings can be changed (as well as whether or not to display other features such as bookmarks etc), the file saved and closed. Once the file is opened again, the PDF will view to the settings that were changed in the preferences. That is fine if changing one file, but if changing dozens at once, or wishing to change the view permanently, this is not an ideal solution.
Solution: The Action Wizard
Instead, the view settings can be changed using the Action Wizard. If unsure where the action wizard is, open any PDF to show the side tabs, and then click on the Tools tab, then check the Action Wizard option.

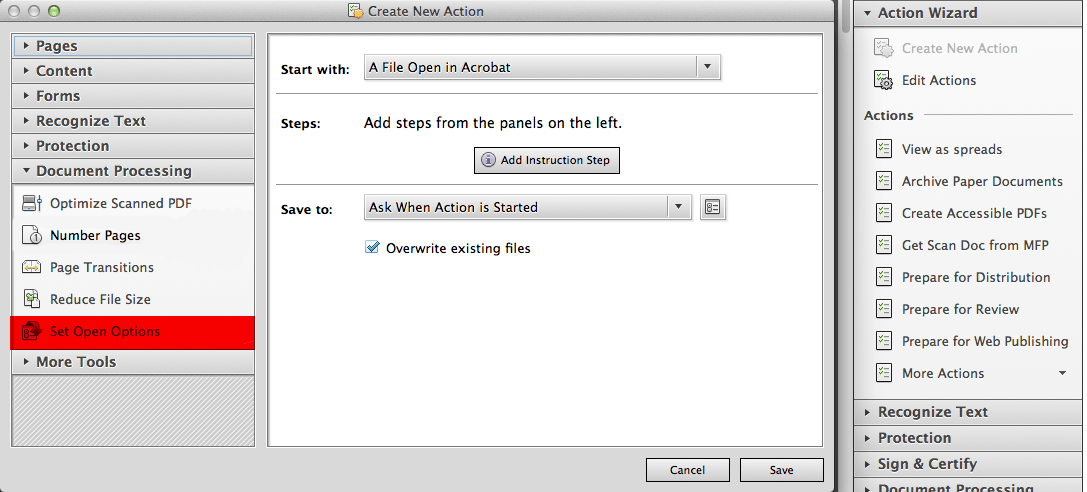
To create a new action, click the Create New Action button. Once clicked, a new dialog box will appear. Since the initial view needs to be changed, go to the Document Processing tab and select the Set Open Options button.
The following example would save a file so that it displayed as readers spreads to fit the screen.
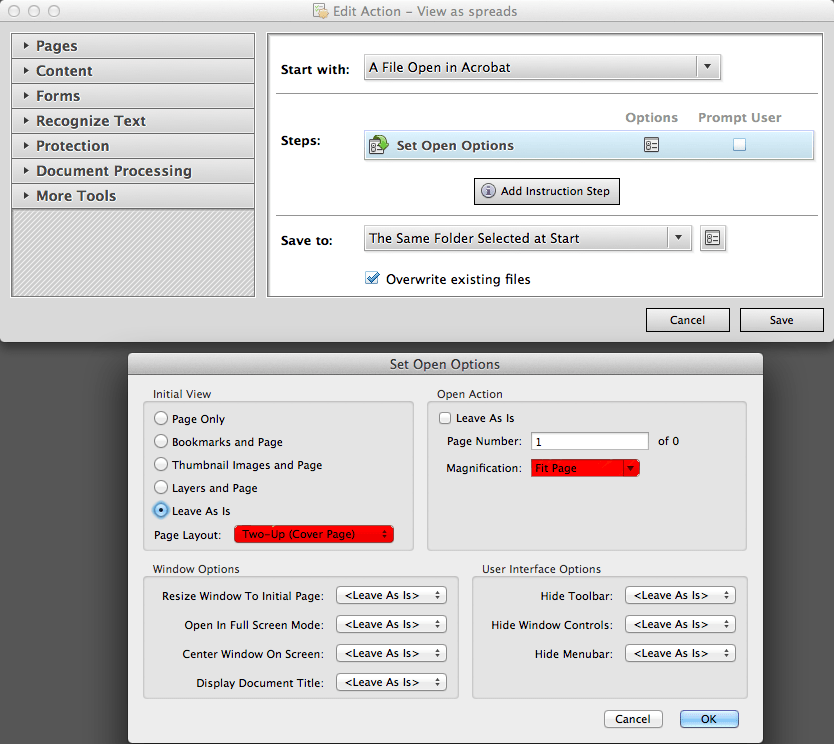
The following example would save a file so that it displayed at 1:1 size.
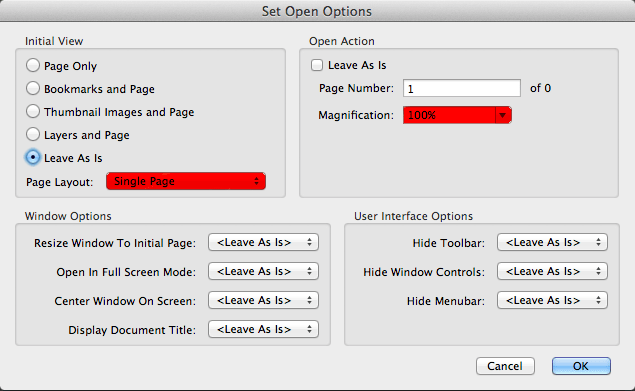
Just like the File/Properties menu, there are more features that can be changed, such as what side tabs to open, whether or not menus or icons should appear.
There is also the ability to change many files other than an open file, as well as what to do with the resulting files. This is done by changing the “Start with” or “Save to” dropdown fields.

When all the relevant settings are made, click Save. A dialog box will prompt for a name and description of the action so it can be found later.

The action is now added to the list of available actions, with the last action used at the top of the list.
Voila! A solution now exists to change the views without lots of navigation through dialog boxes.
[…] A previous Colecandoo article presented a way of being able to control the view size and page presentation of PDFs used as soft-proofs for clients. The solution was to use the Actions tool in Adobe Acrobat to apply an appropriate action that contains the necessary view size/page presentation settings. […]
[…] previous Colecandoo articles (part one and part two) discussed the inability of InDesign to control the view size and appearance of PDFs […]