
An earlier post “To Overprint or not to Overprint, Black is the question” explains how the colour labelled [Black] in InDesign behaves, and when solid black ink should and should not knock out of the colours behind it.
Paying attention to this advice and applying it to artwork should result in a good printed reproduction, correct? While the answer should be yes, there is one more level of control of black appearance and overprints, and that is in the hands of the printing company and their output software.
OFFSET EXAMPLE
Let us look at this following example:

This card is set up for a Black plus spot output for an offset press. The Black is only overprinting on the text as misregistration would be noticeable here, but the Black elsewhere is knocking out so that the colour does not look muted through the yellow.
However, despite best intentions and checking the separations both in InDesign and Acrobat, the card has printed like this (effect is exaggerated for the screen):

So what has happened? The separations were correct, they were checked in both InDesign and Acrobat! It turns out that the Raster Image Processor (RIP) software that the commercial printer uses to image the design onto the printing plates has its own settings. Here are some example screenshots from AGFA’s Apogee X system and Fuji’s XMF system respectively about the overprinting of black:
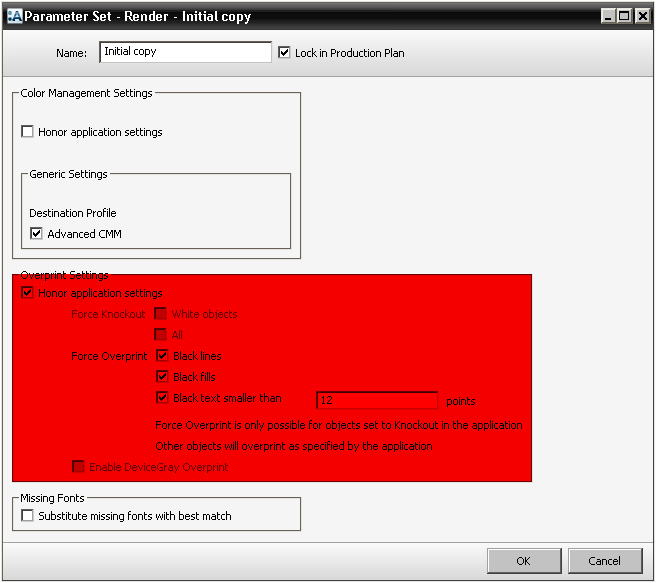

In both screenshots above, the respective RIP software CAN honor the settings that were in the initial PDF and not apply its own preferences, but in the instance of the business card, the RIP settings overrode the PDF settings and chose to overprint all instances of 100% black, regardless what swatches were chosen in InDesign.
DIGITAL PRINT EXAMPLE
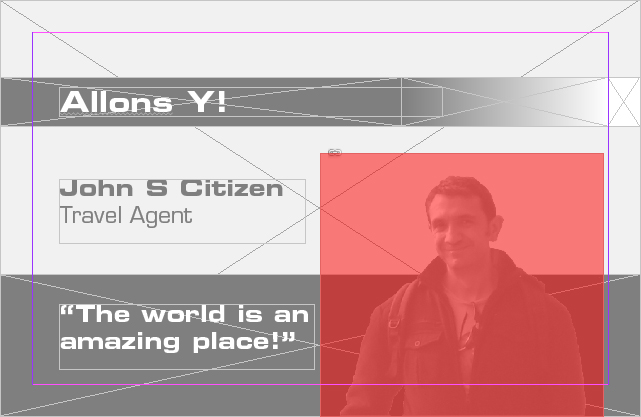
Using the same artwork, the card was printed via a colour copier, but this time the result was as follows:

So what happened here? The while the solid black looks good, where the black in the top line meets the vignette looks rather weak, and there are is a lighter black around the travel agent. What is going on?
Again, the RIP software has manipulated the artwork with unintentional results. Unlike printing directly to a desktop printer, most digital printers will print to a RIP where the file can be imposed, colour adjusted and printed in whatever order the prepress operator sees fit.
Using the EFI Fiery RIP, there is a little-known feature of the RIP that changes the way black is displayed that can produce unexpected results, and that is in the color settings dialog box and it is “Pure Black On”.

This setting takes every instance of 100K and ramps the colour to a “super black” as opposed to using the black toner only. Again, this setting can be changed, but when this card was printed, the defaults were unchanged resulting in this unwanted appearance.
This setting only applies to vectors and text AFTER the PDF is flattened into postscript. This is visible where the rich black abruptly changes to the muted black. One look at the flattener preview in InDesign confirms that areas of flat black in that image were as a result of the flattening.
THE RESULT?
This small example shows how changing the client’s intended black overprints can have unwanted consequences. For prepress operators it is a wake-up call to make sure that the RIP defaults will maintain the clients’ expected results; and for designers or publishers it is worth understanding that even the treatment of black overprint is an important topic.
[…] that cover the issue in greater depth and are worth a read. The links to those articles are here and […]